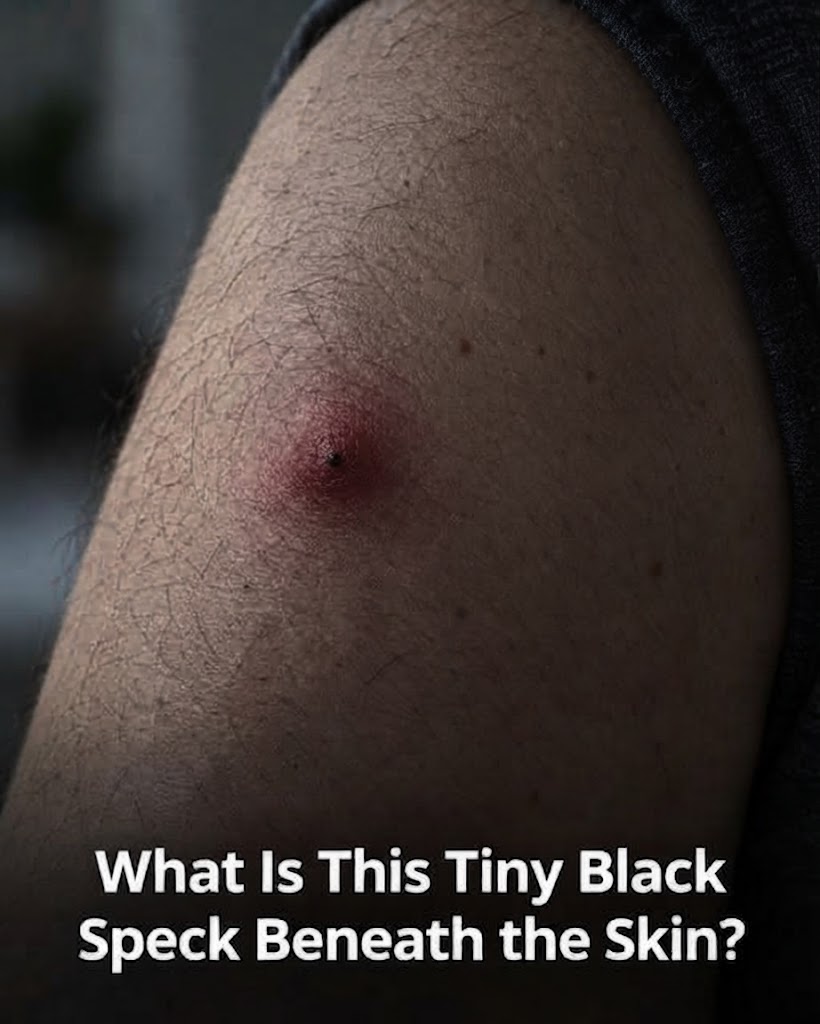
A Hard Red Bump With a Dark Speck in the Center: What Parents Should Check First
Meta description: A red swollen bump with a black speck in the center may be an insect sting, attached tick, splinter, or irritated bite. Learn how to examine it safely, what to remove, and when a child needs medical care.
Discovering a hard red bump on a toddler’s arm can be worrying—especially when a tiny dark object appears to be lodged in the center.
The spot might be a retained bee stinger, an attached tick, a small splinter, a scab over an insect bite, or another foreign object. It could also be a normal puncture mark that only looks like something is embedded.
The correct response depends on what the dark speck actually is.
A bee stinger should be removed promptly. An attached tick also needs to be removed as soon as possible, but with a different technique. A deeply embedded splinter may require medical assistance. Digging at an ordinary scab, meanwhile, can turn a mild bite into an infected wound.
Before reaching for a needle or trying an online remedy, examine the area carefully and look for clues.
First, Check How the Child Is Feeling
Before focusing on the bump, look at the child’s overall condition.
Call emergency services immediately if the child has:
Difficulty breathing
Wheezing, gasping, or persistent coughing
Swelling of the lips, tongue, mouth, or throat
Trouble swallowing
A hoarse or suddenly altered voice
Widespread hives
Repeated vomiting after a bite or sting
Severe dizziness, collapse, or unusual limpness
Pale, blue, or gray skin
Extreme sleepiness or difficulty waking
These symptoms may indicate anaphylaxis, a potentially life-threatening allergic reaction.
Do not spend time trying to remove a speck or applying a home remedy when the child is having breathing or circulation symptoms. Use prescribed epinephrine immediately if an emergency action plan instructs you to do so, and call emergency services.
Examine the Speck Without Digging
Move to a well-lit area and gently wash your hands. A magnifying glass or the zoom function on a phone camera may make the spot easier to see.
Ask the following questions:
Does the speck sit on top of the skin or underneath it?
Does it have visible legs?
Is there a tiny sac attached?
Is it shaped like a thin sliver?
Does it look flat like dried blood?
Did the child recently play outdoors?
Was the child near bees, flowering plants, grass, wood, or mulch?
Is the bump painful, itchy, warm, or rapidly enlarging?
Are there additional bumps elsewhere?
Do not repeatedly squeeze the bump. Pressure can increase pain, push a foreign object deeper, or cause an attached tick to release fluids.
Taking a clear photograph before removal can be helpful, especially if the object might be a tick.
Possibility 1: A Retained Bee Stinger
Honeybees can leave a barbed stinger in the skin after stinging. A small venom sac may remain attached.
Wasps, hornets, and yellow jackets generally do not leave their stingers behind and can sting more than once.
A bee sting commonly causes:
Immediate sharp or burning pain
A red swollen bump
Warmth around the site
A tiny dark stinger in the center
Increasing local swelling over several hours
Itching as the area begins to settle
Young children may develop a surprisingly large local reaction. Swelling can increase for a day or two before gradually improving and may take several days to disappear completely.
A large local reaction is not automatically the same as anaphylaxis, but the child should be monitored closely for symptoms beyond the sting site.
How to Remove a Bee Stinger
Remove a visible bee stinger as quickly as possible.
Speed is more important than debating whether scraping or tweezing is the perfect method.
To remove it:
Keep the child’s arm still.
Scrape across the skin with the edge of a clean card or a clean fingernail, or grasp the stinger close to the skin with clean tweezers.
Avoid squeezing an attached venom sac if one is clearly visible.
Wash the area with soap and water.
Apply a cold compress wrapped in cloth.
Do not continue digging if the object cannot be removed easily or if you are unsure that it is a stinger. A healthcare professional can examine the area.
Possibility 2: An Attached Tick
A very small tick may look like a black seed, freckle, or speck of dirt. Some immature ticks are tiny enough to be difficult to recognize without magnification.
Look closely for:
A rounded or oval body
Tiny legs near the skin
An object firmly attached rather than loosely resting on top
Recent exposure to grass, brush, wooded areas, leaf litter, or animals
A dark speck that does not brush away
An attached tick may not initially cause much pain or itching.
Ticks should be removed promptly because the risk of certain infections can increase the longer some species remain attached.
How to Remove an Attached Tick
Use clean, fine-tipped tweezers if available.
Grasp the tick as close to the skin’s surface as possible.
Hold it near its head or mouthparts rather than squeezing its swollen body.
Pull upward using slow, steady, even pressure.
Do not twist or jerk.
After removal, clean the bite area and your hands with soap and water or an appropriate antiseptic.
Place the tick in a sealed container or bag, wrap it in tape, or dispose of it according to local guidance.
Record the date and location where the exposure probably occurred.
Do not burn the tick, cover it with petroleum jelly, apply nail polish, pour essential oil over it, or try to suffocate it.
These methods may delay removal and can irritate the tick, potentially causing it to release additional fluid into the skin.
What if Part of the Tick Remains?
Occasionally, the tick’s mouthparts break off and remain in the skin.
If a visible piece can be grasped easily with clean tweezers, it may be removed in the same way as a splinter.
If it cannot be removed easily, do not repeatedly cut or dig into the child’s skin. The body can often push out a tiny remaining fragment as the area heals.
Contact a healthcare professional if the site becomes increasingly red, swollen, painful, or drains pus.
The remaining mouthparts do not continue transmitting a tick-borne infection once the tick’s body has been removed.
Monitoring After a Tick Bite
Watch the child for several weeks after removing an attached tick.
Contact the child’s healthcare professional if the child develops:
Fever
Headache
Unusual fatigue
Muscle or joint pain
Swollen joints
Facial weakness
A new spreading rash
An expanding round or oval patch
A rash with a target-like appearance
Other unexplained illness
Tell the clinician about the tick bite, when it occurred, and where the child may have acquired it.
The risk of disease depends on the tick species, geographic location, attachment time, and other factors. Not every tick bite requires antibiotics.
Do not give leftover antibiotics or attempt preventive treatment without medical guidance.
Possibility 3: A Splinter or Plant Thorn
A small piece of wood, thorn, fiberglass, or other material can become embedded in the skin and create a firm red bump.
This possibility is more likely if the child recently:
Played on a wooden deck
Handled sticks or mulch
Crawled on a rough floor
Played near thorny plants
Touched unfinished furniture
Fell on an outdoor surface
A splinter may look like a thin dark line or a tiny black point beneath the skin.
The surrounding area can become red and tender as the body reacts to the foreign material.
How to Remove a Superficial Splinter
A small splinter may be removed at home if one end is clearly visible and easy to grasp.
Wash your hands and the child’s skin with soap and water.
Clean a pair of fine-tipped tweezers.
Grasp the exposed end of the splinter.
Pull it out in the same direction it entered.
Wash the area again.
Apply a clean bandage if necessary.
Stop if the splinter breaks, is deep, lies beneath a nail, is near the eye, or cannot be grasped without digging.
A clinician should remove deeply embedded objects, large thorns, glass, or material that causes increasing inflammation.
The child’s tetanus vaccination status should also be reviewed if the wound was dirty or caused by a contaminated object.
Possibility 4: A Scab or Central Puncture Mark
Many ordinary insect bites create a small central mark.
The dark speck may be:
A tiny scab
Dried blood
Dirt trapped on the surface
A puncture point
A small crust created by scratching
A visible hair follicle
Mosquito, flea, gnat, ant, and other bites can cause a firm red bump, particularly in young children who develop strong local reactions.
If the dark area is flat, cannot be grasped, and looks like part of the skin, do not try to remove it with a needle.
Scraping or digging at a scab can restart bleeding, introduce bacteria, and delay healing.
Possibility 5: A Large Local Reaction
Children sometimes develop much larger reactions to insect saliva or venom than adults.
A large local reaction may produce:
Firm swelling
Redness
Warmth
Intense itching
A small central puncture